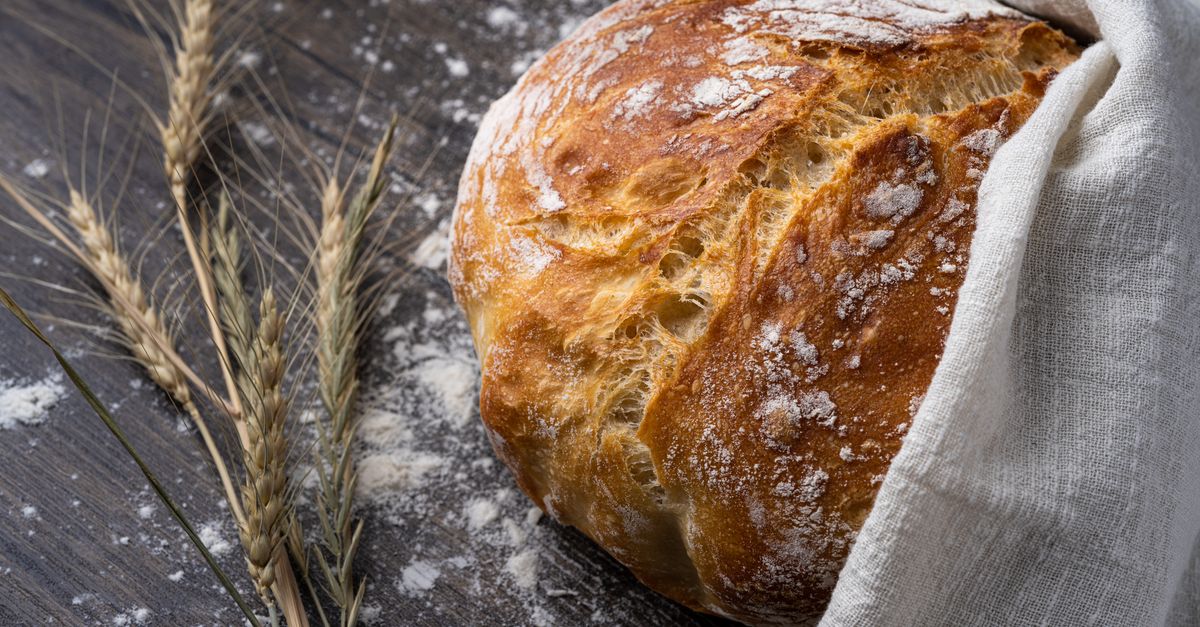
Why Your Homemade Bread is Dry, Crumbly, and Dense (And The Simple Shifts That Guarantee a Light, Airy Loaf Every Time)
There’s little more disheartening than pulling a loaf of homemade bread from the oven, anticipating that perfect aroma and tender crumb, only to discover it’s dry, crumbly, and dense. I’ve been there, more times than I care to admit. For years, my attempts at artisan bread ended in disappointment – heavy bricks that were passable for toast but far from the airy, chewy perfection I craved. It felt like I was following recipes precisely, yet the results were consistently lackluster. The mistake I see most often, and one I made myself for far too long, isn’t usually about a single ‘secret ingredient’ but a cascade of subtle missteps in technique and understanding of the dough itself.
What changed everything for me wasn’t a fancy new recipe or an expensive bread machine. It was a deeper dive into the why behind common bread-making problems, understanding the science of yeast and gluten, and implementing small but crucial adjustments to my process. The difference was night and day. My bread went from being a dense disappointment to a proud, light, and airy centerpiece. In my experience, most home bakers struggle with these issues because they’re unknowingly undermining the very structure they’re trying to build. Let’s uncover the hidden culprits and get you baking bread you’ll be genuinely proud of.
Key Takeaways
- Too much flour or too little hydration is the most common cause of dry, dense bread.
- Insufficient kneading prevents proper gluten development, leading to a weak, crumbly structure.
- Rushing the proofing process results in underdeveloped flavor and a tight, dense crumb.
- Over-proofing can cause the gluten structure to collapse, leading to a weak, crumbly texture.
- Incorrect oven temperature or lack of steam can hinder oven spring and crust development.
You’re Using Too Much Flour (or Too Little Water)
This is, hands down, the number one culprit behind dry, dense, and crumbly bread. When I started baking, I was terrified of sticky dough. Every recipe would say, ‘add more flour if the dough is too sticky,’ and I took that as a license to keep dusting until the dough was perfectly manageable, almost dry to the touch. The result? Predictably heavy, dry loaves.
The Science: Flour absorbs water. The more flour you add relative to the water, the less hydrated your dough becomes. Properly hydrated dough is crucial for gluten development. Gluten is the protein network formed when flour and water combine and are kneaded. This network traps the gases produced by yeast, creating those lovely air pockets we associate with light, airy bread. If there isn’t enough water, the gluten strands can’t fully form and stretch, leaving you with a tight, dense crumb that easily crumbles.
What Changed Everything For Me: I started weighing my ingredients, especially flour and water, using a digital kitchen scale. Measuring flour by volume (cups) is incredibly inaccurate; a cup of flour can vary by 20-30% in weight depending on how it’s scooped and packed. Once I committed to weight measurements, my hydration became consistent. I also learned to embrace a slightly sticky dough. Many artisanal bread recipes call for doughs with 70-80% hydration, which will feel sticky. Resist the urge to add more flour than the recipe specifies by weight. If the dough is genuinely unmanageable, use a little water on your hands or a bench scraper to help, rather than more flour.
Actionable Step: Invest in a digital kitchen scale (they’re inexpensive!) and always measure your flour and water by weight (grams are ideal). For most standard bread recipes, aim for a hydration level between 60-70% (e.g., for 500g flour, use 300-350g water). Start on the higher end and see how the dough feels. It should be tacky, but not so wet it can’t hold any shape.
You’re Not Kneading Enough (or You’re Over-Kneading)
Kneading is where the magic of gluten development happens. It’s the process that transforms a shaggy, disorganized mass of flour and water into a smooth, elastic dough. For years, I either kneaded for too short a time, fearing I’d somehow ‘overwork’ the dough, or I kneaded haphazardly, without a real understanding of what I was trying to achieve.
The Science: Kneading stretches and aligns the gluten proteins, forming the strong, elastic network that gives bread its structure and chew. This network is essential for trapping carbon dioxide gas from the yeast, allowing the bread to rise and develop an open crumb. Too little kneading means a weak gluten structure, which can’t hold gas efficiently, leading to a dense, crumbly loaf. Over-kneading, while less common for home bakers by hand, can eventually break down the gluten structure, leading to a similarly dense, albeit sometimes tough, result.
What Changed Everything For Me: I learned to perform the windowpane test. This simple technique tells you exactly when your dough is properly kneaded. Take a small piece of dough, gently stretch it between your fingers. If you can stretch it thin enough to see light through it without it tearing, your gluten is sufficiently developed. If it tears easily, keep kneading. This visual cue removed all the guesswork for me.
Actionable Step: Knead your dough thoroughly, aiming for 8-10 minutes by hand or 5-7 minutes in a stand mixer (on medium-low speed) after the initial mixing. Continuously perform the windowpane test until the dough passes. The dough should feel smooth, elastic, and spring back when gently poked.
You’re Rushing the Proofing Process
Proofing, or fermentation, is where yeast does its work, producing gases that make the dough rise and developing much of the bread’s flavor. This is a step I always tried to speed up, thinking ‘faster rise, faster bread.’ Big mistake. Rushing proofing is a guaranteed path to dense, flavorless bread.
The Science: Yeast activity is temperature-dependent. Warm environments speed up rising, but true flavor development, especially from slower-acting enzymes and secondary fermentation products, requires time. A slow, cool proof (like in the refrigerator) allows these complex flavors to develop and strengthens the gluten structure, making the dough more extensible and able to hold more gas. If dough rises too quickly, it often means the yeast has gorged on sugars, producing a lot of gas but little flavor, and the gluten hasn’t had enough time to relax and strengthen, resulting in a tight, uneven crumb.
What Changed Everything For Me: I started paying attention to the dough, not the clock. Instead of relying solely on time estimates, I looked for visual cues that indicated proper proofing. For the first rise (bulk fermentation), I now look for the dough to have visibly increased in volume by 50-75% and to appear bubbly and airy. For the second rise (final proof), I use the poke test. Gently poke the dough with a floured finger; if the indentation slowly springs back halfway, it’s ready. If it springs back immediately, it needs more time. If it stays indented, it’s likely over-proofed.
Actionable Step: Don’t rush proofing. For bulk fermentation, allow 1-2 hours at room temperature, or consider a slower, cold proof in the refrigerator for 8-12 hours for superior flavor and texture. For the final proof, use the poke test to determine readiness, typically 45-90 minutes at room temperature, but adjust based on your environment and the dough’s response.
You’re Baking at the Wrong Temperature (or Without Steam)
The oven is the final frontier for your bread. Many home bakers assume any hot oven will do, but precise temperature and the introduction of steam are critical for achieving that beautiful crust, oven spring, and airy interior.
The Science: Bread needs a high initial temperature to create a strong crust quickly, which helps lock in moisture and allows for maximum ‘oven spring’ – the final burst of rising that occurs in the first 10-15 minutes of baking. Steam is equally vital. It keeps the surface of the dough moist, preventing it from forming a hard crust too early. A soft, moist surface allows the dough to expand freely, contributing to a better oven spring and a thinner, crisper crust. Without steam, the crust forms prematurely, restricting expansion and leading to a dense interior.
What Changed Everything For Me: I realized my oven thermometer was invaluable because oven temperatures can vary wildly. More importantly, I started creating a steamy environment. For a long time, I just put a pan of hot water in the bottom of my oven, but it often evaporated too quickly. Now, I preheat a cast iron Dutch oven or a pizza stone (with a separate pan for water underneath) for at least 30-45 minutes before baking. When using a Dutch oven, the lid traps the steam from the dough itself, creating a perfect environment. When using a pizza stone, I pour about a cup of boiling water into a preheated cast iron pan or broiler pan on the bottom rack right as I load the bread, then quickly close the oven door.
Actionable Step: Always preheat your oven with your baking vessel (Dutch oven, pizza stone) to the correct temperature (usually 450-500°F or 230-260°C) for at least 30-45 minutes. For a Dutch oven, bake covered for the first 20-30 minutes, then uncovered to brown. If using a pizza stone, create steam by pouring boiling water into a hot pan on the oven floor immediately after loading the bread, and seal quickly. Remove the steam source after 10-15 minutes.
You’re Not Letting It Cool Completely Before Slicing
This might seem like a minor point, but for a long time, my impatience sabotaged my otherwise decent loaves. Who can resist a warm, crusty slice of freshly baked bread? I certainly couldn’t. However, slicing too early often resulted in a gummy, seemingly undercooked interior, even if it was fully baked.
The Science: Even after it comes out of the oven, bread continues to cook as it cools. This process, called carryover cooking, allows residual heat to finish setting the internal structure, firm up the starches, and allow excess moisture to redistribute evenly throughout the loaf. Slicing too early interrupts this process, releasing steam too quickly and leaving the crumb dense, wet, and sometimes even sticky or gummy. The texture hasn’t fully set, leading to a poorer mouthfeel and a perception of dryness even with adequate hydration.
What Changed Everything For Me: Discipline. Pure and simple. I learned to let the bread cool completely on a wire rack. For smaller loaves, this might be 1-2 hours. For larger, denser loaves (like sourdough boules), it can be 3-4 hours, or even overnight. I found that if I really needed a warm slice, I would wait at least an hour, then slice off just what I needed, allowing the rest of the loaf to continue cooling intact.
Actionable Step: Always cool your bread completely on a wire rack before slicing. Resist the temptation! For most standard loaves, this means at least 2 hours, and often longer for larger, denser bread. This ensures the internal structure fully sets, resulting in a superior texture and flavor.
Frequently Asked Questions
How can I tell if my bread is properly hydrated?
Properly hydrated dough will be tacky and slightly sticky, but still manageable. It should feel alive and elastic, not stiff or dry. When you stretch it, it should have some resistance but also stretch without tearing immediately. The best way to ensure proper hydration is to weigh your ingredients, especially flour and water, using a digital scale. Experienced bakers often judge by feel, aiming for a dough that is soft but still holds its shape after kneading.
Can I use a bread machine for a lighter loaf?
A bread machine can certainly produce a lighter loaf, but the same principles of hydration and sufficient kneading apply. Ensure you’re measuring ingredients by weight. Many bread machines have a ‘dough’ cycle, allowing you to knead and proof in the machine, then shape and bake in a conventional oven, which often yields better results than fully baking in the machine. Experiment with your machine’s specific settings and recipes to find what works best for your desired texture.
How does yeast type affect bread density?
Active dry yeast, instant yeast, and fresh yeast all perform similarly in terms of leavening, but their activity levels can vary. Using too much yeast can lead to a very fast rise, which might result in a dense crumb because the gluten structure doesn’t have enough time to develop properly before the gas production peaks. Conversely, too little yeast can lead to a slow or incomplete rise. The key is to use the recommended amount for the recipe and allow adequate proofing time, regardless of yeast type, to balance gas production with gluten development and flavor.
My bread comes out dense around the edges but lighter in the middle. Why?
This often points to uneven heat distribution in your oven or insufficient steam during the initial bake. The outer parts of the dough may be setting too quickly before the full oven spring can occur. Ensure your oven is fully preheated (use an oven thermometer!) and that you’re consistently introducing steam in the first 10-15 minutes of baking. Another possibility is that the loaf wasn’t fully proofed; a dough that’s slightly under-proofed can sometimes have a denser outer ring.
What is ‘oven spring’ and why is it important?
Oven spring is the rapid expansion of bread dough when it’s first placed into a hot oven. It’s caused by the sudden increase in yeast activity (due to heat) and the expansion of trapped gases and evaporating water. Significant oven spring contributes to a light, airy crumb structure and a well-risen, aesthetically pleasing loaf. It’s primarily influenced by proper gluten development (from kneading), adequate but not excessive proofing, and a high initial oven temperature with sufficient steam.
Conclusion
Baking truly great homemade bread is a journey, not a destination. It requires patience, attention to detail, and a willingness to understand the nuanced science behind the ingredients. For me, shifting my focus from simply following instructions to truly understanding what the dough needed at each stage was the breakthrough. By consistently weighing my ingredients, paying attention to gluten development through the windowpane test, allowing the dough ample time to proof visually (not just by the clock), baking with consistent high heat and steam, and having the discipline to let my loaves cool completely, my bread transformed. Your kitchen can produce light, airy, and flavorful bread that rivals any bakery, and it all starts with these practical, often overlooked, adjustments. Happy baking!
Written by Chloe Davies
Home & Practical Skills
A creative professional, Chloe brings a practical eye to topics like home organization, simple living, and managing side hustles.
You Might Also Like

Why Your Homemade Soup is Bland (And The Flavor Secrets That Changed Everything For Me)
Discover why your homemade soups lack depth and learn the flavor secrets that transform them from bland to brilliant every time.

Why Your Homemade Sauces Are Too Thick or Gummy (And The Pro Secrets for Silky Perfection Every Time)
Stop settling for gummy, thick sauces. Discover the pro secrets to achieve silky smooth, perfect consistency every time for your homemade creations.
Why Your DIY Firewood Pile Collapses (And The Pro Stacking Secrets That Last All Winter)
Stop your firewood pile from collapsing! Learn the pro stacking secrets that ensure stability, proper drying, and last all winter.