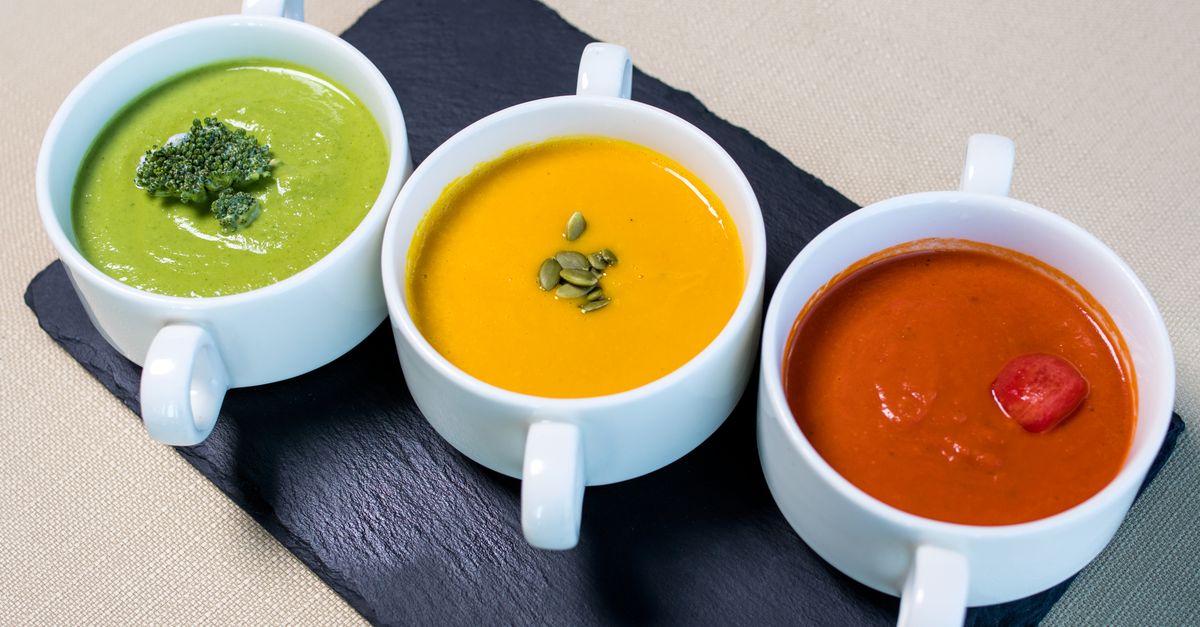
Why Your Homemade Soup Is Bland (And The Flavor Secrets That Changed Everything For Me)
Every winter, there’s nothing I crave more than a steaming bowl of homemade soup. It’s supposed to be soul-warming, deeply flavorful, a culinary hug. Yet, for years, my attempts at creating that perfect, rich soup fell flat. I’d follow recipes diligently, chop all the vegetables, simmer for hours, and still end up with something… watery, uninspired, and frankly, bland. It was infuriating. I’d see gorgeous, bubbling pots on cooking shows, hear friends rave about their ‘secret family recipes,’ and wonder what magic I was missing. My soup was sustenance, sure, but it was never that show-stopping, comforting masterpiece I envisioned.
I used good ingredients. I didn’t skimp on the aromatics. I seasoned with salt and pepper. What was I doing wrong? The mistake I see most often, and one I made for far too long, wasn’t about adding more ingredients, but about how I was treating the ingredients I already had. It was about developing layers of flavor, understanding extraction, and embracing techniques that build depth from the very beginning, rather than trying to fix blandness at the end.
This isn’t just about adding more salt. It’s about a foundational shift in how you approach soup making, moving from merely combining ingredients to actively building flavor. What changed everything for me wasn’t a single, secret ingredient, but a series of interconnected techniques that transformed my soups from forgettable to utterly unforgettable. These aren’t complicated, but they are crucial, and once you incorporate them, you’ll wonder how you ever made soup without them.
Key Takeaways
- Embrace intense caramelization of aromatics and vegetables to build foundational sweetness and depth, avoiding mere softening.
- Utilize the ‘fond’ at the bottom of the pot through deglazing to integrate rich, browned flavors into your broth.
- Incorporate ‘umami bombs’ early in the cooking process to add savory, mouth-filling complexity that elevates every spoonful.
- Layer your salt applications, seasoning components individually and adjusting the final product, rather than relying on a single late addition.
- Understand how to properly thicken your soup for a more luxurious mouthfeel and concentrated flavor, moving beyond watery broths.
Caramelize, Don’t Just Soften: The Foundation of Flavor
For years, my soup recipes would instruct me to ‘sauté onions, carrots, and celery until softened,’ and I did exactly that. My vegetables would become translucent, slightly limp, and I’d move on. This, I now realize, was my first and biggest mistake. Softened vegetables contribute texture and a mild flavor, but they don’t build the depth that truly sings in a great soup. What they need is caramelization.
Caramelization is the process where the natural sugars in vegetables break down under heat, turning golden brown and developing incredibly complex, sweet, and nutty flavors. Think of the difference between a raw onion and a deeply caramelized one – the latter is almost candy-like in its sweetness. This is the flavor you want to build into the very bedrock of your soup.
To achieve this, you need patience and medium-low heat. I start with a generous amount of fat (butter or olive oil, sometimes a mix) in a heavy-bottomed pot. Add your diced onions first, letting them sweat down for 5-7 minutes until translucent. Then, crucially, don’t rush. Continue cooking them, stirring occasionally, for another 10-15 minutes, or even longer, until they turn a rich, golden brown. They shouldn’t be burnt, but they should have a significant color change. I often add a pinch of salt at this stage too, which helps draw out moisture and speeds up the browning.
Once the onions are deeply caramelized, I add the carrots and celery. Again, don’t just soften them. Let them cook, stirring, until they too start to take on some color – usually another 8-10 minutes. This foundational caramelization is where the magic begins. It creates a natural sweetness and a deeply savory base that will permeate every spoonful of your soup. This step alone transformed my bland soups more than any other single adjustment. It’s not about quick sautéing; it’s about slow, deliberate browning to unlock hidden sugars and complex aromas.
The Power of the Fond: Don’t Leave Flavor Behind
After you’ve spent all that time caramelizing your vegetables, you’ll notice something wonderful (or what used to seem like a nuisance): a browned, crusty layer forming at the bottom of your pot. This, my friends, is pure gold – it’s called the fond, and it’s packed with concentrated, delicious flavor. Many novice cooks, myself included, used to view this as burnt bits, something to scrape off and discard. Oh, how wrong I was.
The fond is a direct result of the Maillard reaction, the same chemical process that browns meats and toasts bread, creating hundreds of new flavor compounds. To properly integrate this flavor into your soup, you need to deglaze the pot. This involves adding a liquid – typically broth, wine, or even a bit of water – to the hot pot after the vegetables have cooked. As the liquid hits the hot surface, it loosens all those caramelized bits, allowing you to scrape them up with a wooden spoon and stir them into the developing soup base.
My routine now involves scraping the fond thoroughly. I pour in about a cup of broth or dry white wine, letting it simmer for a minute or two, vigorously scraping the bottom until every last browned bit is incorporated. The liquid will turn a rich, murky brown – this is exactly what you want. This deglazing step adds an incredible layer of savory depth and complexity that would otherwise be lost. It’s like extracting all the goodness that cooked onto the pot and returning it to the soup, multiplying the flavor tenfold. It’s a simple technique that has a massive impact, ensuring no flavor is left behind.
Umami Bombs: The Secret to Savory Depth
Even with excellent caramelization and deglazing, some soups still yearn for a certain richness, a mouth-filling savory quality that goes beyond simple saltiness. This is where umami bombs come in. Umami is often called the ‘fifth taste,’ a deeply satisfying savory sensation that makes food taste richer and more complete. It’s abundant in ingredients like mushrooms, aged cheeses, ripe tomatoes, soy sauce, and anchovies.
I’ve found that incorporating umami-rich ingredients early in the cooking process radically transforms my soups. Here are my go-to’s:
- Tomato Paste: A tablespoon or two, added after caramelizing the vegetables and cooked for a minute or two until it deepens in color, is a game-changer. It concentrates the tomato flavor and adds a fantastic umami base, especially for hearty vegetable or bean soups.
- Mushrooms: Dried porcini mushrooms are fantastic. I rehydrate them, chop them finely, and add them to the pot with the vegetables. The soaking liquid, strained to remove grit, then becomes part of the deglazing or main broth. Fresh mushrooms, sautéed until deeply browned, also contribute significantly.
- Parmesan Rinds: Don’t throw them away! I keep a bag of parmesan rinds in my freezer. Adding one or two to the simmering soup for the last 30-60 minutes infuses it with an incredible savory, nutty depth. Just remember to fish them out before serving.
- Soy Sauce or Fish Sauce: A small dash (start with half a teaspoon) can add a profound savory note without making the soup taste Asian. It’s about enhancing the existing flavors, not changing the profile entirely. This works particularly well in meaty or earthy soups.
These ingredients don’t just add their own flavor; they amplify the umami of everything else in the pot, creating a richer, more cohesive taste experience. For example, a dollop of miso paste dissolved in a bit of hot broth and stirred into a vegan mushroom soup late in the cooking process can elevate it to new heights. It’s about consciously seeking out and adding that savory dimension that makes your palate sing.
Layer Your Salt: Seasoning as You Go, Not Just at the End
One of the most common pitfalls in soup making, and one I struggled with, is treating salt as an afterthought. We’re told to ‘season to taste’ at the end, but this often leads to a flat, one-dimensional saltiness. True flavor development involves layering your salt throughout the cooking process, seasoning individual components as they’re added, rather than dumping it all in at once.
Think about it: if you sauté onions without salt, they’ll soften but taste bland. Add a pinch of salt, and suddenly their natural sweetness comes forward. When I start caramelizing my vegetables, I add a good pinch of kosher salt. This helps draw out moisture, encourages browning, and seasons the vegetables themselves, rather than just the broth they’ll eventually swim in.
When I add other components – like a protein, or even more vegetables – I’ll add another small pinch of salt. Then, when I add the broth, I’ll taste it again. I’m aiming for a subtle seasoning at each stage, building up to the desired level. The final ‘season to taste’ then becomes an adjustment, a fine-tuning, rather than a desperate attempt to rescue blandness. This approach ensures every element of the soup is seasoned correctly, contributing to a harmonious and deeply flavored whole.
It’s also crucial to remember that different broths and ingredients will have varying levels of sodium. If you’re using store-bought broth, opt for low-sodium versions so you have more control over the salt content. This layered salting technique ensures that your soup doesn’t just taste salty, but seasoned – a crucial distinction that separates home cooking from restaurant-quality dishes.
The Right Consistency: Beyond Watery Broth
Sometimes, even with great flavor, a soup can feel underwhelming if its texture is too thin and watery. A luxurious mouthfeel contributes significantly to the perception of richness and depth. Moving beyond a bland, watery broth means understanding how to achieve the right consistency for your particular soup.
For creamy soups, a common mistake is adding too much liquid or not blending properly. I now always blend creamy soups in batches, starting with less liquid than I think I need, then adding more hot broth until I reach the desired consistency. For a truly velvety texture, an immersion blender is a fantastic tool, but a stand blender will give you the smoothest result. Passing it through a fine-mesh sieve afterward (especially if using a stand blender) can remove any last bits for an ultra-smooth finish.
For hearty, chunky soups, a slight thickening can make all the difference. This isn’t about making it a stew, but about giving the broth body. My favorite methods:
- Mash Some Vegetables: For bean or potato-based soups, simply mashing some of the cooked beans or potatoes directly in the pot against the side with a spoon or potato masher can naturally thicken the broth and add creaminess without any added flour or cream.
- Roux or Slurry: For a more traditional thickening, a roux (equal parts fat and flour cooked together) or a cornstarch slurry (cornstarch mixed with a small amount of cold liquid) can be used. Add these gradually and simmer to cook out any raw flour taste.
- Reduce the Broth: My preferred method, if time allows, is simply to let the soup simmer, uncovered, for an extra 15-30 minutes towards the end. This allows some of the liquid to evaporate, concentrating the flavors and naturally thickening the broth to a more substantial consistency. This also intensifies the flavors you’ve built throughout the cooking process.
Experiment with these techniques. A slightly thicker, more viscous broth clings to the other ingredients, delivering a more impactful flavor experience with every spoonful. It elevates the soup from a simple liquid to a cohesive, satisfying meal.
The Finishing Touches: Acidity and Freshness
Even after all these foundational steps, a soup can sometimes still feel like it’s missing something – a spark, a brightness that lifts all the rich, savory flavors. This is almost always a lack of acidity and freshness. Just a small touch at the very end can transform a good soup into a great one.
A squeeze of lemon juice or a splash of vinegar (red wine, apple cider, or even balsamic, depending on the soup) right before serving can cut through richness, brighten flavors, and add a much-needed zing. It’s a trick I learned from professional chefs, and it works wonders. For tomato-based soups, a dash of balsamic vinegar is sublime. For chicken noodle, lemon juice is perfect. Start with a half teaspoon, stir, taste, and add more if needed.
Beyond acidity, fresh herbs provide a burst of aroma and a welcome contrast to the cooked flavors. Chopped fresh parsley, cilantro, dill, or chives stirred in at the last minute, or even sprinkled on top as a garnish, adds vibrancy. A swirl of good quality olive oil, a dollop of crème fraîche or Greek yogurt, or a sprinkle of toasted nuts or seeds can also add textural interest and another layer of subtle flavor.
These are the final grace notes, the flourishes that signal care and attention to detail. They awaken the palate and ensure that your soup finishes as strong as it started, leaving a lasting impression of vibrant, balanced flavor. Don’t skip them – they are the difference between a deeply flavored soup and one that truly excites the senses.
Frequently Asked Questions
How much salt should I add when cooking soup?
It’s not about a fixed amount, but about timing and tasting. Add a pinch of kosher salt to your aromatics (onions, carrots, celery) as they caramelize. Add another pinch with any additional vegetables or proteins. Then, once your broth is added and simmering, taste it. Use low-sodium broth to have more control. The goal is to season each component, building flavor, rather than trying to fix blandness with a large salt addition at the very end. The final ‘season to taste’ is for fine-tuning, not foundational salting.
Can I use water instead of broth for soup?
While you can use water, it’s a primary reason soups end up bland. Broth (chicken, beef, or vegetable) provides an immediate, deep layer of flavor that water simply cannot. If you must use water, you’ll need to work harder to build flavor through intense caramelization, umami bombs (like tomato paste, mushrooms, or parmesan rinds), and ample seasoning. I always recommend using a good quality, low-sodium broth as a base.
What if my soup is still bland after trying these tips?
A common issue, and one you can often fix! First, check your seasoning: does it need more salt? Often, a bland soup is simply under-salted. Next, consider acidity: a squeeze of lemon juice or a splash of vinegar can brighten and lift all the flavors. Finally, if it still feels flat, a small addition of an umami-rich ingredient like a dash of soy sauce, fish sauce, or miso paste (dissolved in a little hot broth) can add profound depth without changing the soup’s core flavor.
My vegetables don’t brown, they just steam. What am I doing wrong?
This is a common issue! You’re likely overcrowding the pot or the heat isn’t high enough (or consistent). Ensure your pot is hot before adding fat, then add vegetables in batches if necessary, giving them space to breathe. Don’t stir constantly; let them sit undisturbed for a few minutes to develop that crucial browning. Use a heavy-bottomed pot, which distributes heat more evenly. Patience is key for proper caramelization.
How do I store leftover soup and maintain its flavor?
Most soups actually taste better the next day as flavors meld and deepen. Cool the soup completely before transferring it to airtight containers. Store in the refrigerator for 3-4 days or freeze for up to 3 months. When reheating, do so gently on the stovetop over low-medium heat. You may need to add a splash of extra broth or water if it has thickened too much, and always re-taste and adjust seasoning (especially salt and a fresh squeeze of acid) as flavors can dull or concentrate during storage.
Can I use frozen vegetables in soup?
Absolutely! Frozen vegetables are convenient and nutritious. However, they can release a lot of water as they cook, which can dilute your flavor and prevent proper browning if added too early. For best results, add frozen vegetables later in the cooking process, after your foundational flavors (caramelized aromatics, deglazed fond, umami bombs) are well established. If they need browning (like mushrooms), thaw and pat them very dry first, and sauté them in a separate pan to avoid overcrowding your main soup pot.
Written by Chloe Davies
Home & Practical Skills
A creative professional, Chloe brings a practical eye to topics like home organization, simple living, and managing side hustles.
You Might Also Like
Why Your DIY Plant Food Fails Most People (And What Actually Works for Thriving Plants)
Discover why common DIY plant food recipes fall short and learn the targeted, effective strategies that guarantee flourishing indoor plants.

Why Passive-Aggressive Communication Undermines You (And How to Finally Master Directness)
Passive aggression feels like a safe option, but it sabotages relationships. Learn how to master direct communication and build trust.

Why Your Home Always Feels Stuffy (Even with Windows Open) — And What Actually Works for Real Freshness
Discover the hidden culprits behind a perpetually stuffy home, even with open windows. Learn practical, non-obvious strategies for true fresh air.