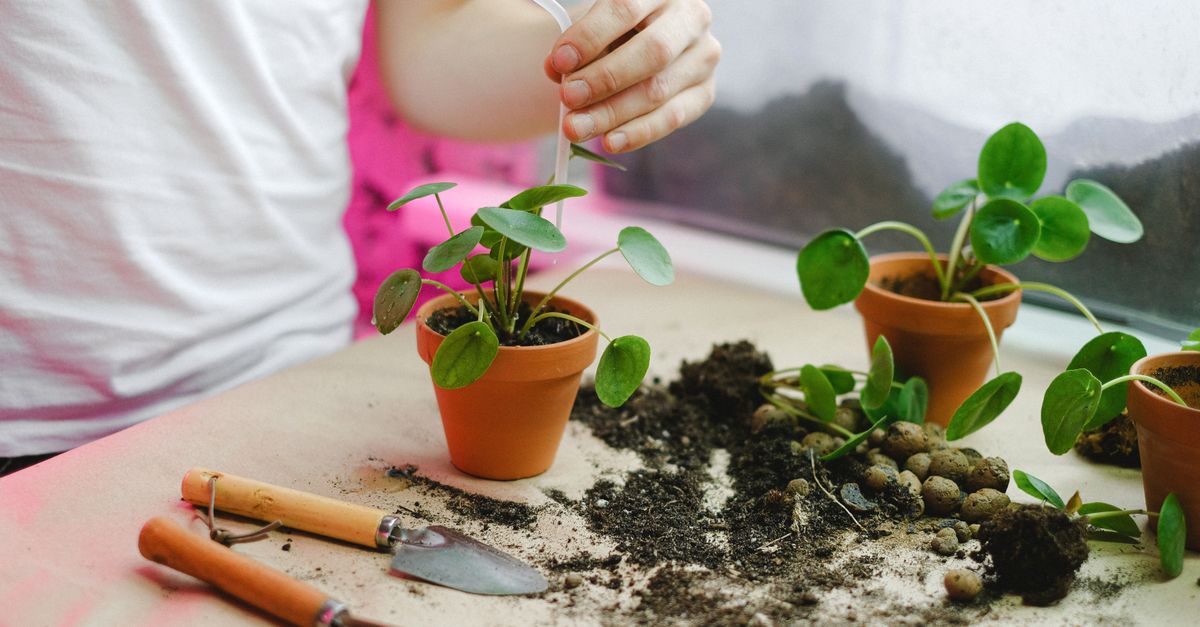
Why Your DIY Plant Food Fails Most People (And What Actually Works for Thriving Plants)
Every dedicated plant parent dreams of lush, vibrant greenery. You see photos of thriving indoor jungles on social media, and you want that for your own space. So, you start experimenting. You’ve probably stumbled upon countless DIY plant food recipes online – banana peels, eggshells, coffee grounds, Epsom salts. They all promise natural, cost-effective nutrition, and sound so appealing. I’ve been there, diligently burying banana peels and sprinkling coffee grounds, only to watch my houseplants look… well, mostly the same, or even worse.
In my experience, the biggest mistake most people make with DIY plant food isn’t that these ingredients are inherently bad; it’s that they’re often applied haphazardly, without understanding the specific needs of the plant or the actual nutrient availability. It’s like throwing a random assortment of ingredients into a pot and hoping for a gourmet meal – without a recipe or understanding of culinary chemistry, you’re usually just making a mess. Your plants have precise nutritional demands, and a one-size-fits-all DIY approach rarely delivers.
The internet is rife with well-meaning but often misinformed advice. What works for a garden tomato in rich outdoor soil is vastly different from what a finicky Fiddle Leaf Fig needs in a small pot indoors. This article isn’t about shaming your composting efforts; it’s about shifting your approach from hopeful guesswork to targeted, science-backed nutrition that truly helps your plants thrive.
Key Takeaways
- Generic DIY plant food recipes often fail because they don’t match specific plant nutritional needs or nutrient availability.
- Focus on understanding macronutrients (N-P-K) and micronutrients, and how your soil’s pH affects their uptake.
- Optimize nutrient delivery by composting ingredients properly or using precise, targeted commercial fertilizers.
- Recognize specific nutrient deficiency signs in your plants and address them with appropriate, measured solutions.
The Mismatch: Why Common DIY Ingredients Fall Short
The allure of using kitchen scraps for plant food is strong. It feels resourceful, eco-friendly, and simple. Banana peels for potassium, eggshells for calcium, coffee grounds for nitrogen. Sounds logical, right? The problem lies in the availability and balance of these nutrients, especially in a potted indoor environment.
Take banana peels, for instance. While rich in potassium, a crucial macronutrient for flowering and fruiting, a raw banana peel takes months, if not years, to decompose enough for its nutrients to become available to your plant’s roots. Burying them directly in a pot can also attract pests, promote fungal growth, and create anaerobic conditions that harm roots, especially in dense potting mix. Furthermore, an indoor houseplant, particularly foliage-focused ones like Monsteras or Pothos, needs far less potassium than, say, an outdoor fruit tree. Overloading a plant with a nutrient it doesn’t need can also lead to other nutrient deficiencies.
Eggshells for calcium follow a similar pattern. Calcium is vital for cell wall development, but finely crushed eggshells still take a long time to break down in soil. Their impact on pH, if significant enough, could also lock up other nutrients. Most houseplants get sufficient calcium from tap water and commercial potting mixes. If calcium is truly deficient, it’s often due to pH imbalance or watering issues, not a lack of eggshells.
Coffee grounds are another popular DIY ingredient, touted for their nitrogen content and ability to acidify soil. While coffee grounds do contain nitrogen, it’s often in a form that’s slow to release. More critically, their effect on soil pH can be a double-edged sword. Most houseplants prefer a slightly acidic to neutral pH (6.0-7.0). If your soil is already acidic, adding more coffee grounds can drop the pH too low, leading to nutrient lockout where plants can’t absorb essential elements even if they’re present in the soil. Excess coffee grounds can also create a hydrophobic layer, repelling water and preventing proper hydration, or compact soil, reducing aeration for roots.
In essence, these DIY methods often provide too little, too late, or too much of the wrong thing. They operate on a macro scale suitable for large outdoor gardens with active microbial communities, not the confined, delicate ecosystem of a houseplant pot.
The Crucial Role of Soil pH in Nutrient Uptake
This is the hidden cost of guesswork. The pH of your soil (its acidity or alkalinity) is arguably the single most critical factor in nutrient availability. It acts like a gatekeeper, determining whether your plant’s roots can actually absorb the nutrients present, regardless of how much banana peel or coffee ground you’ve added.
Most houseplants thrive in a slightly acidic to neutral range, typically between 6.0 and 7.0. Within this window, essential macronutrients like nitrogen (N), phosphorus (P), and potassium (K), along with vital micronutrients such as iron, manganese, and zinc, are most soluble and readily available for root uptake. Step outside this optimal range, and nutrients can become ‘locked out.’
For example, if your soil becomes too alkaline (high pH), iron and manganese, crucial for chlorophyll production and overall vigor, become insoluble and unavailable. Your plant might show classic signs of iron deficiency, like yellowing leaves with green veins (chlorosis), even if there’s plenty of iron in the soil. Conversely, if your soil becomes too acidic (low pH), phosphorus can become unavailable, leading to stunted growth and purple-tinged leaves.
DIY additions like coffee grounds (acidic) or wood ash (alkaline) can drastically alter pH without precise measurement. Without knowing your current soil pH and your plant’s preferred range, you’re essentially flying blind. A simple soil pH test kit (available at any garden center) is an inexpensive investment that provides invaluable information, guiding your fertilization efforts rather than hindering them.
What changed everything for me was realizing that blindly adding ‘nutrients’ was pointless if the pH wasn’t right. It’s like having a perfectly healthy meal but being unable to open your mouth to eat it.
Targeted Nutrition: Understanding N-P-K and Micronutrients
If you’re serious about your plants, you need to think like a scientist, not a chef throwing scraps into a pot. This means understanding the N-P-K ratio and the importance of micronutrients.
- N (Nitrogen): Essential for lush, green, leafy growth. Think leaves and stems. Plants like Monsteras, Pothos, and Philodendrons are big nitrogen lovers.
- P (Phosphorus): Crucial for root development, flowering, and fruiting. Think strong foundations and vibrant blooms. Flowering plants like African Violets or Orchids need more phosphorus during their bloom cycle.
- K (Potassium): Important for overall plant health, disease resistance, water regulation, and enzyme function. It’s the general ‘health and vigor’ nutrient.
Commercial fertilizers clearly state their N-P-K ratio (e.g., 10-10-10 or 20-5-10). A balanced fertilizer (like a 10-10-10) is good for general growth, while a ‘foliage’ fertilizer might have a higher nitrogen number (e.g., 20-5-10) for leafy plants, and a ‘bloom’ fertilizer a higher phosphorus number (e.g., 5-10-5) for flowering plants. This allows for targeted feeding.
Beyond N-P-K, micronutrients like iron, magnesium, calcium, zinc, and boron are vital, though needed in smaller quantities. Many DIY methods completely ignore these, or provide them inefficiently. Commercial potting mixes usually contain enough micronutrients for a few months, but over time, these can be depleted. High-quality liquid fertilizers often include a complete spectrum of micronutrients, ensuring your plant gets everything it needs.
My mistake was assuming a banana peel covered all bases. What I learned was to use a diluted, balanced liquid fertilizer during the growing season (spring and summer) and tailor it to the plant’s specific needs. For example, my Calatheas get a slightly more acidic feed, while my orchids get a bloom booster during their season. This precision is something kitchen scraps simply cannot offer.
The Power of Proper Composting (And Why It’s Not For Direct Potting)
Let’s be clear: composting is fantastic. It’s an excellent way to transform kitchen scraps and yard waste into a nutrient-rich soil amendment. The magic of composting is that it involves microbial decomposition, breaking down organic matter into stable humus and making those previously locked-up nutrients bioavailable to plants. A well-rotted compost pile will have a balanced pH and a diverse range of nutrients that are easily absorbed.
However, finished compost is an outdoor soil amendment, not an indoor potting mix supplement for direct, regular feeding. While you can incorporate a small amount of finished compost into a potting mix when repotting, using it as a regular ‘feed’ or top dressing for indoor plants can still lead to issues.
- Pests: Even finished compost can introduce fungus gnats or other unwelcome visitors into your indoor environment.
- Nutrient Imbalance: The exact N-P-K of homemade compost is unknown. You could inadvertently be over or under-fertilizing if you rely solely on it.
- Texture & Drainage: Adding too much compost to a dense indoor potting mix can alter drainage and aeration, which are crucial for root health in pots.
Instead, if you’re a keen composter, use your finished compost for your outdoor garden beds or mix a very small amount (no more than 10-15%) into fresh potting soil when repotting a plant every 1-2 years. For active indoor feeding, a diluted liquid fertilizer remains the most controlled and effective method. The key is to let nature (and microbes) do their work fully in a dedicated compost system, not directly in your houseplant’s pot.
Recognizing and Addressing Nutrient Deficiencies
One of the most powerful shifts you can make is learning to read your plants. They communicate their needs through their leaves, stems, and overall growth. Instead of a generic DIY solution, learn to identify specific nutrient deficiency symptoms and then provide a targeted remedy. This is where the N-P-K knowledge truly pays off.
- General Yellowing of Older Leaves (especially at the tips, moving inward): Often a sign of Nitrogen (N) deficiency. Older leaves are affected first because the plant relocates nitrogen to new growth. Remedy: Use a fertilizer with a higher nitrogen ratio.
- Stunted Growth, Dark Green or Purplish Leaves: Can indicate Phosphorus (P) deficiency. Plants might also fail to flower or produce small, weak blooms. Remedy: Use a bloom-booster fertilizer (higher P) or a balanced general-purpose one.
- Yellowing or Browning Leaf Edges/Tips (especially older leaves), sometimes with brown spots: A classic sign of Potassium (K) deficiency. Remedy: A balanced fertilizer or one with a slightly higher K.
- Yellowing Between Leaf Veins (chlorosis), especially on new growth, with veins remaining green: A strong indicator of Iron (Fe) deficiency. Often linked to high soil pH. Remedy: Lower soil pH (carefully!) or use an iron chelate supplement.
- Lower Leaves Yellowing Between Veins (chlorosis), sometimes with reddish-brown spots: Points to Magnesium (Mg) deficiency. Remedy: Epsom salts (magnesium sulfate) can be a targeted solution if magnesium is the specific issue, but use sparingly and dilute heavily.
What truly changed everything for me was a simple plant care journal where I noted symptoms and what I used to treat them. This allowed me to learn from my plants’ responses and refine my feeding strategy. Don’t be afraid to pull a yellowing leaf off and observe it closely. Your plants are telling you a story; you just need to learn their language.
The ‘What Actually Works’ Approach to Plant Feeding
So, if DIY methods are often inefficient or even harmful, what does actually work? It boils down to a targeted, controlled, and consistent approach.
Start with Good Soil: The foundation of a healthy plant is good quality potting mix. Commercial mixes are designed with the right balance of drainage, aeration, and initial nutrients. Replace it every 1-2 years during repotting to replenish depleted nutrients and prevent compaction.
Test Your Water: If you have very hard water, it can raise soil pH over time. Consider letting tap water sit for 24 hours to allow chlorine to dissipate, or use filtered water for sensitive plants. If your tap water is significantly alkaline, occasional flushing with distilled or rainwater can help, or you can use a pH-adjusting fertilizer.
Choose a Quality Liquid Fertilizer: For most indoor plants, a balanced (e.g., 5-5-5 or 10-10-10) all-purpose liquid houseplant fertilizer is your best bet. Look for one that includes a range of micronutrients. Read the label carefully!
Dilute, Dilute, Dilute: This is the most crucial step. Most commercial fertilizers are formulated to be potent. For indoor plants, I recommend using half or even quarter the recommended strength at each watering during the growing season (spring and summer). Over-fertilizing is far more damaging than under-fertilizing, leading to fertilizer burn (crispy leaf edges, stunted growth, white crust on soil).
Fertilize Consistently During Growing Season: During spring and summer, when plants are actively growing, fertilize every 2-4 weeks with your diluted solution. Reduce or stop fertilizing entirely in fall and winter when most plants enter a dormant or slower growth phase.
Listen to Your Plant (and Soil): Observe new growth. Is it robust and green? Are flowers forming? If you see signs of deficiency, consult a plant care guide or use a targeted supplement (e.g., an iron chelate for iron deficiency) rather than a generic DIY solution. Monitor your soil for any crusting or unusual smells.
This approach might seem less ‘natural’ than burying kitchen scraps, but it’s effective because it’s precise and controlled. You’re giving your plants exactly what they need, when they need it, in a form they can actually use.
Frequently Asked Questions
Can I use fish emulsion or seaweed extract as DIY plant food?
Yes, these are exceptions to the general rule against kitchen scraps because they are already processed and readily bioavailable. Fish emulsion is a good source of nitrogen, and seaweed extract provides potassium and micronutrients, often with plant hormones that promote growth. However, they can be smelly, so they’re best used diluted and sparingly for indoor plants. Always follow dilution instructions carefully, as they can still burn roots if too concentrated. They’re more akin to a commercial liquid fertilizer than a raw kitchen scrap.
How often should I fertilize my houseplants?
Generally, fertilize actively growing houseplants (spring and summer) every 2-4 weeks with a diluted liquid fertilizer. Reduce or stop fertilizing entirely during their dormant period in fall and winter. Over-fertilizing is a common mistake, leading to salt buildup and root burn, which is far worse than under-fertilizing.
What are the signs of over-fertilization?
Signs include yellowing or browning leaf tips and edges (especially older leaves), stunted growth, wilting, leaf drop, and a white, crusty residue on the soil surface or pot rim. If you suspect over-fertilization, flush the soil thoroughly with plain water until it drains freely from the bottom of the pot. Do this several times to wash away excess salts, then hold off on fertilizing for a month or two.
Do all houseplants need the same type of fertilizer?
No. While a general-purpose balanced fertilizer (e.g., 5-5-5) is suitable for most foliage plants, specific plants have different needs. Flowering plants (like African Violets, Orchids) benefit from a higher phosphorus blend during their bloom cycle. Acid-loving plants (like Azaleas, Gardenias, though less common indoors) might prefer a fertilizer designed to maintain lower pH. Always research your specific plant’s needs.
Is it better to use slow-release fertilizer pellets or liquid fertilizer?
Liquid fertilizers offer more control and immediate nutrient availability, allowing you to adjust dosage based on the plant’s current needs and growth phase. Slow-release pellets are convenient but less adaptable, as they release nutrients over a set period regardless of the plant’s fluctuating demands. For most houseplant enthusiasts, diluted liquid fertilizer is the preferred method for precision and preventing over-fertilization.
My plant is struggling. Should I fertilize it more?
No. A struggling plant is often stressed, and fertilizing it can do more harm than good, exacerbating issues like root rot, pest infestations, or improper watering. First, identify the root cause of the struggle (watering, light, pests, temperature, humidity, transplant shock). Address those issues, and once the plant shows signs of recovery and active growth, then resume fertilizing at a diluted strength.
Conclusion
Giving your houseplants the right nutrition isn’t about magical concoctions or blindly following internet trends. It’s about understanding their specific needs and applying nutrients in a way they can actually use. Ditch the banana peels and eggshell powder as primary feeding methods, and instead, embrace the power of proper soil, a quality balanced liquid fertilizer, careful dilution, and consistent observation. By doing so, you’ll move beyond hoping your plants thrive to confidently cultivating a truly vibrant indoor oasis. Your plants will thank you for it, and you’ll finally achieve that lush, thriving greenery you’ve always dreamed of. Happy growing!
Written by Chloe Davies
Home & Practical Skills
A creative professional, Chloe brings a practical eye to topics like home organization, simple living, and managing side hustles.
You Might Also Like
Why Your Homemade Soup Is Bland (And The Flavor Secrets That Changed Everything For Me)
Discover why your homemade soups lack flavor and the specific, actionable techniques that transformed my cooking, delivering restaurant-quality taste.

Why Passive-Aggressive Communication Undermines You (And How to Finally Master Directness)
Passive aggression feels like a safe option, but it sabotages relationships. Learn how to master direct communication and build trust.

Why Your Home Always Feels Stuffy (Even with Windows Open) — And What Actually Works for Real Freshness
Discover the hidden culprits behind a perpetually stuffy home, even with open windows. Learn practical, non-obvious strategies for true fresh air.